Sunday, February 14, 2010

Facts less known : A technical view of James Cameron’s AVATAR

avatar_movie_poster

Be a gadget, movie, machine, building or any man-made marvels, I would like to have a knowledge on what technical work has gone in the background. This post is out of one such venture by me online/offline for Avatar. The Sci-fi block buster directed by James Cameron and produced by 20th Century Fox, Avatar is yet another CG (Computer Graphics) marvel and the highest gross feature film ever made. More than 80% of the film is virtual consisting 110 minutes of full CG and 20 minutes of live action - CG combo.

VFX companies

The lead visual effects company that brought Jim’s vision real on screen was Weta Digital in Wellington, New Zealand. It has won two academy awards for visual effects in The Lord of the Rings and King Kong along with an Oscar nomination for I-Robot.

avatar_james_cameron_movie_images_air_vehicles_01

Though the major elements like the Pandora environment, characters and creatures were developed at Weta, to help finish the special effects sequences on time, a number of other companies were brought on board, including Light & Magic, which worked alongside Weta Digital to create the battle sequences. ILM was responsible for the visual effects for many of the film's specialized vehicles and devised CGI explosions. Others were BUF, Halon, Hybride, Hydralux, Lola, Pixel Liberation Front, Stan Winston studio and the Third Floor.

Tools

Hundreds of animators, computing specialists working with a plethora of technologies and experimenting new techniques, brought out Avatar for Jim.

AutoDesk’s Maya and Motionbuilder were two major tools used, where the former created 3D stereo graphics and the later helped in real time motion capture integration and rendering.

Adobe Photoshop was used to create many of the ultra-high resolution matte paintings and textures that were used as finished artwork passed along to the 3D pipeline for CG environments, vehicles and creatures.

avatar-movie-01_1920x1080

AdobeLight room was used by artists in the previsualization stage to organize and catalog the thousands of set and lighting reference images.

Adobe After Effects was used to automate rough compiling of the video of the facial performances of the actors into CG character. It was also used to create complex motion graphics for use in the 3D holographic screens in the various control room scenes, and to create “heads-up” displays for various high-tech vehicles in the film.

Adobe Premiere Pro was used for creative editing and immediate review

Acrobat Connect was used for collaboration throughout the making of the film like sharing data with the crew for review and changes after immediate rendering.

Shooting Techniques:

Performance capture: The process of recording movement and translating that movement onto a digital model. It is used in military, entertainment, sports, and medical applications. In filmmaking it refers to recording actions of human actors, and using that information to animate digital character models in 2D or 3D computer animation. When it includes face, fingers and captures subtle expressions, it is often referred to as performance capture.

Nearly 120 industrial cameras from Basler vision were rigged up around the set. The floor was marked with a grid, marking the areas covered by each camera. The actors wore special black leotards, with white reflective spots stuck all over. The cameras tracked the movement of those dots, not of the actors.

Computers receiving that camera feed would create rough virtual characters, moving in exactly the same way, instantly. When Zoe Saldana, the lead actress moved, a crude model of Neytiri, her virtual avatar in the computer, mimicked her actions. This was not new for Weta as they have already mo-capped for King Kong and LOR

Real time facial Expression: This was completely a new venture by Weta demanded by Jim. We quickly lose interest in digital faces that don't properly emote. To make his avatars believable, Cameron made real human actors act out everything. While wearing special headgear, with powerful inbuilt cameras.

Avatarmotioncapture

Avatars had eyebrows which would show most emotions clear-cut, but Navi’s din’t have. To compensate that every movement of the eyeball, dilation of the pupil, quiver of the lips, tightening of muscles under the skin was recorded and fed to a computer. The processing system has to deal with a world that is interactive and unpredictable. It is not possible to know where the actor is going to be in the next few seconds; therefore, it is not possible to plan the shots as a film maker would do. To solve this issue, the system relies on artificial intelligence to select the most appropriate shots which was used to create expressions for the digital characters.

3D Cameras: Real humans often share screen space with the visually rich digital characters in Avatar. To ensure they didn't look out of place, they had to be shot in three dimensions.

Till recently, 3D cameras were the size of a fridge. And weighed 250 kilos. Two separate cameras, kept a few feet apart, and moved together by huge cranes would record shots, which would later be played by two separate projectors at the theatre.

cameronavatar1

Cameron made a light, twenty five kilo 3D camera, Just like our eyes, it's got two separate inbuilt lenses, which move and change focus on objects independently. A computer combines the images they record and overlaps them to create a 3D effect.

Virtual Camera: This one's a simple notebook sized LCD screen, with video game like controls built in. But it displays the virtual world being generated by supercomputers, not the real set he's actually shooting in..

Directors who used computer graphics earlier would have to imagine what their final shots would look like. With the virtual camera, Cameron had it all right in front of his eyes. He could walk to different corners of the set, or change his height from the top of a tree stump to onboard a hovering helicopter. Weta’s supercomputers would sense where he was on the grid and recreate his virtual planet from that perspective. He could choose a final shot from wherever he pleased on the grid, and the computers would faithfully generate it.

The Data Center

To render Avatar according to Paul Gunn, Systems Administrator at Weta , they have used a 10,000-sq foot server farm with 4,000 HP blade servers with over 35,000 64-bit processors in their data center with all of the rendering nodes using Red Hat enterprise Linux and 90% of their desktops running Ubuntu. Weta Digital has one of the world’s largest Linux clusters. It is ranked #193 amongst the top 500 supercomputers of the world with processing capabilities of 10 Gigaflops.

clip_image001

Creating the Na'vi characters and the virtual world of Pandora required over a petabyte of digital storage. For the last month of production the systems were handling 7 or 8 gigabytes of data per second, running 24 hours a day. A final copy of Avatar equated to 17.28 gigabytes per minute of storage.

Note : The information, statistics and images were purely attained out of interest by Googling and from the magazine Computer Graphics world . This post contains information from various web sources like forums, wikis etc. Links are below.

Links:

Making of Avatar at Youtube

http://www.youtube.com/watch?v=7c4kNLz_4E8

Computer Graphics World - CG In Another World

http://www.cgw.com/Publications/CGW/2009/Volume-32-Issue-12-Dec-2009-/CG-In-Another-World.aspx

Wiki highest gross films

http://en.wikipedia.org/wiki/List_of_highest-grossing_films

Avatar and Weta Digital

http://en.wikipedia.org/wiki/Avatar_%282009_film%29

Linux and Avatar

http://www.linux-netbook.com/10-blockbusters-made-with-the-help-of-linux

Weta Data center

http://www.datacenterknowledge.com/archives/2009/12/22/the-data-crunching-powerhouse-behind-avatar/

Jaimon Joseph’s Blog

http://ibnlive.in.com/blogs/jaimonjoseph/326/54022/cutting-edge-tech-and-the-making-of-avatar.html

Adobe products in Avatar

http://www.webkitchen.be/2009/11/26/a-peek-behind-the-scenes-of-avatar/

Motion Capture

http://en.wikipedia.org/wiki/Performance_capture

Virtual camera system

http://en.wikipedia.org/wiki/Virtual_camera_system

Sunday, February 7, 2010

Arduino Digital Pulse Counter

Measuring heart rate per minute is a part of my academic project for which I had to count digitally high pulses coming from the sensor. Having a Sanguino board (ATMEGA664P based) which is an Arduino variant, counting became easy with the peripherals like timers and interrupts.

Googling for arduino pulse counter mainly yielded results from forums which was of some use, but not satisfied which lead to this post with a generalized pulse counter. This has numerous applications. One quick example could be measuring RPM of a motor.

Here pulse is given as external interrupt and counted meanwhile a timer takes care of measuring interval.Knowledge of timers and interrupts in AVR architecture is required.AVRFreaks has an excellent tutorial on AVR timers.One of the best I would say.

Plunging into code directly :

It can be downloaded here.(remove the .txt to open in arduino IDE)

/***
File : Pulse.pde (opens in arduino IDE www.arduino.cc)
Description : Counts digital pulse on External Interrupt 0 for 1 minute and prints the value serially
Date : 6th February 2010
Author : Kishore Sheik Ahamed M R
Contact : kishoreinme@gmail.com
***/


int iTestPin=13; //Pin which generates test pulses, this is not needed when actual pulse is available for measurement
int iPulsePin = 10; //Pin serving as external interrupt (INT 0) to count the pulses
static int siPulseCounter=0; //Variable keeping track of pulse counts
static int siSecondCount=0; //Variable keeping track no. of seconds in the timer1 block

void SetupTimer1() //Setting up timer1 with appropriate register values
{

TCCR1A = 0; // No PWM is used.So set this to zero.
TCCR1B = 1<<CS12 | 0<<CS11 | 0<<CS10; // Input clock is set to F(cpu)/256
TIMSK1 = 1<<TOIE1; // Enable timer interrupt to detect overflow
/***
Set the timer count to overflow to in 1 second.
My board has a 16MHz oscillator.
Reload Timer Value = ((2 ^ Bits) - 1) - ((Input Frequency / Prescale) / Target Frequency)
= 65535 - ((16 x 10 ^6 Hz)/256)/1 Hz
= 65535 - 62500
= 3035
***/
TCNT1=0x0bdb; //3035 in hex
}


ISR(TIMER1_OVF_vect) // Timer1 ISR when it overflows
{

TCNT1=0x0bdb; //Reset Timer1 to count another second
siSecondCount++; //Increase second count
if(siSecondCount>=60) //If 60 Seconds are attained Print the Pulse count to serial port.
{

Serial.print("Pulse Count is ");
Serial.print(siPulseCounter,DEC); //Print as decimal value
siPulseCounter=0; //Reset counter values for next minute cycle
siSecondCount=0;
}
}

void setup(void)
{


pinMode(iPulsePin, INPUT); // Set Pulsepin to accept inputs
digitalWrite(iPulsePin, HIGH);
pinMode(iTestPin, OUTPUT); // Test signal generator pin as output. Can be ignored if the actual digital signal is available
attachInterrupt(0, count, RISING); // Caputres external interrupt 0 at iPulsepin at rising edge and calls funtion count defined below
Serial.begin(9600); // Begin Serial communication at baudrate 9600 bps
SetupTimer1(); // Call Setuptimer1 function
Serial.println(" Initialising, Please wait...");

}

void loop(void)
{


/*** Following 4 lines just generate pulses for testing purposes.
All the 4 lines Can be ignored if the actual digital signal is available ***/

digitalWrite(iTestPin, HIGH); // sets the iTestPin ON
delay(1000); // waits for a second
digitalWrite(iTestPin, LOW); // sets the iTestPin off
delay(1000); // waits for a second


}


void count() // Function called by AttachInterrupt at interrupt at int 0
{

siPulseCounter++; //increment the pulse count

}


/* End of Pulse.pde */


Now lets dissect the code.


int iTestPin=13;              //Pin which generates test pulses,actually not needed
int iPulsePin = 10; //Pin serving as external interrupt (INT 0) to count
static int siPulseCounter=0; //keeping track of pulse counts
static int siSecondCount=0; //keeping track no. of seconds


External Interrupt zero(0) is a pin numbered 10 in my Sanguino which counts the pulses, and Pin 13 genrates test pulses to count in the absence of actual pulses.


Seperate counters for keeping track of pulse count and time are declared static for unique use through out the program.


Next, Timer is set.


void SetupTimer1() //Setting up timer1 with appropriate register values
{

TCCR1A = 0; // No PWM is used.So set this to zero.
TCCR1B = 1<<CS12 | 0<<CS11 | 0<<CS10; // Input clock is set to F(cpu)/256
TIMSK1 = 1<<TOIE1; // Enable timer interrupt to detect overflow
TCNT1=0x0bdb;
}


The interval 1 minute to be measured is actually a very loooooooonnngg time for a chip running at 16MHz. Thus the timer is calibrated such that it counts 1 sec which is executed 60 times. 16 bit long Timer1 is suitable for this purpose


If you lack knowledge on timers , please refer to the tutorial referenced above.Firstly the timer1 is given a prescalar of 256 so that it approximately yielded 1.04 secs for a full run from 0x0000 to 0xFFFF.


This is achieved by setting prescalar in TCCR1B as 0100 for CS12 CS11 and CS10 and loading the Timer count with value 0xbdb in hex or 3550 in decimal which is calculated as follows:


Timer Value = ((2 ^ Bits) - 1) - ((chip Input Frequency / Prescale) / Target Frequency )

= (2^16-1) - ((16 x 10 ^6 Hz)/256)/1 Hz


= 65535 - 62500


= 3035.


The Timer1 interrupt is enabled by setting TOIE1


ISR(TIMER1_OVF_vect)  // Timer1 ISR when it overflows
{

TCNT1=0x0bdb; //Reset Timer1 to count another second
siSecondCount++; //Increase second count
if(siSecondCount>=60) //If 60 Seconds are attained Print the Pulse count to serial port.
{
Serial.print("Pulse Count is ");
Serial.print(siPulseCounter,DEC); //Print as decimal value
siPulseCounter=0; //Reset counter values for next minute cycle
siSecondCount=0;
}
}


Here comes the Timer1 ISR (Interrupt service Routine).What does it do? Simple. After every second,the timer1 overflows and generates an interrupt which increments the second counter by 1. If it is equal to 60, the static pulse count is printed serially and counting variables are reset.


void setup(void)
{
pinMode(iPulsePin, INPUT); // Set Pulsepin to accept inputs
digitalWrite(iPulsePin, HIGH);
pinMode(iTestPin, OUTPUT); // Test signal generator pin as output. Can be ignored if the actual digital signal is available
attachInterrupt(0, count, RISING); // Caputres external interrupt 0 at iPulsepin at rising edge and calls funtion count defined below
Serial.begin(9600); // Begin Serial communication at baudrate 9600 bps
SetupTimer1(); // Call Setuptimer1 function
Serial.println(" Initialising, Please wait...");

}


Straight forward arduino code to set I/O ports and serial communication except attachInterrupt(0, count, RISING);


This code just capture external interrupt zero (pin 10 as declared above) at the rising edge of pulse applied and calls a user defined funtion named count().


void loop(void)
{
digitalWrite(iTestPin, HIGH); // sets the iTestPin ON
delay(1000); // waits for a second
digitalWrite(iTestPin, LOW); // sets the iTestPin off
delay(1000); // waits for a second
}


The above lines just generate pulses for testing purposes.This loop can be empty if actual signal is available.


void count()   

siPulseCounter++; //increment the pulse count

}


This is the count() function mentioned above for the AttachInterrupt code.Its almost the ISR for the interrupt incrementing a counter each time when a pulse occurs and there ends the code.Connect the test pulse generating pin and the interrupt pin physically.


The point to be noted here is if the test signal generation code is removed, all actions happen just by hardware interrupts or in other words the code does not demand processors attention every time (expect the initializations) which can be utilized for any other purpose.


Hope the post was useful. cheers :-)

Thursday, May 28, 2009

Free Online Storage : ADrive, SkyDrive, Gmail – features, comparison and their Desktop clients.

If you are unaware or new to file sharing/storing online, the first question that will arise is “Why should I store online and how will it benefit me?

  • Whenever your local storage like  PC  Hard drive fails or external storage is damaged or lost, files stored online in some reliable servers would serve as effective backup .
  • Protect your files from viruses attack.
  • You can access your files anywhere , anytime in the world.
  • Share files online  with your friends/Team mates for some collaborative work.
  • Uploading  files like photos, documents or some daily work done  time to time  will be  fond memories of your development.

Options

So what are Options ? There are a lot of paid and free services online and I will discuss  free  storage services more than 5GB.The features of these services are discussed and compared in a table later in this article.

Using Gmail Space

The first option can be using the ~7GB Gmail inbox space as virtual Hard drive. This is accomplished by using a Firefox add –on called Gspace or a windows shell extension  named Gmail Drive.

Gspace integrates with Firefox giving a FTP kind of interface for file transaction.

gspace

This operates in four modes as explained here.

Gmail Drive Shell extension for windows makes Gmail’s Inbox space as a drive in your PC.

gmail drive

This storage is not legal and is accomplished by cheating Google like sending own mails with attachments to the Inbox with specific labels. This service may get terminated or may not work if Google makes technical changes in Gmail configurations.

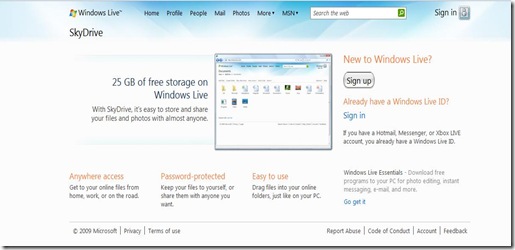
SkyDrive

http://skydrive.live.com/

It is part of its live services and needs a live account. Though the service is from Microsoft, it  is free! and and being web based, its platform independent. So,  Linux and MAC users can also consume this “Microsoft” service for free!

 sky

ADrive

http://www.adrive.com/

adrive

This service from ADrive LLC., is free at basic level with a 50gb massive storage. Other paid services from this player includes higher storage capacity and many other facilities which can be compared here.


Feature

Gspace/Gmail Drive

SkyDrive

ADrive

Space ~7GB  (varies with Gmail inbox size) 25GB 50GB

FTP connection
No. But the interface is similar while using Gspace with Firefox
No
No. Available for paid Members

Official Desktop client
No. only 3rd party add-on/shell extension No. Upload tool with Drag and drop facility only for IE from Microsoft
No
Account Gmail account Windows Live account ADrive Registration
Folder Level Transaction No No Yes
File Sharing No Only Public Folder Yes, with permissions

Interface
Local. Depends on the tool used  Web. Catchy and colorful but not navigation friendly. Web. Explorer Kind of Interface.

Reliability

Not Guaranteed

Extra Features

4 Operation modes (mentioned above)

Completely integrated with Windows Live services like Photo gallery 

File searching, Zoho Editor.


600px-Caution_sign_used_on_roads_pn.svg Though these seem to be attractive, there is a major issue called Privacy. We cant just sit back and enjoy keeping our personal files somewhere in a unknown server. But every firm has its own privacy policy and can hope that they will follow it at least to cope up with emerging competitions.

Gladinet Desktop Client

http://www.gladinet.com

gladsiteshot

A decent desktop client providing cloud computing services. It supports SkyDrive, ADrive, Google Picasa, Google Docs, Amazon storage for free at basic level.


gladtaskbar

It creates a network drive with folders of names with services we choose. Copies files we transact to a local cache and uploads files in background. Folder level transactions are possible with this client  even in SkyDrive.Only move and cut operations are not allowed

driveshot 

Hope the article was useful!

Sunday, May 24, 2009

Download Free Engineering Video Lectures : NPTEL – An IITs/IISc Joint venture

National Program on Technology Enhanced Learning – NPTEL is a joint venture of the 7 IITs and IISc, Bangalore funded by the Ministry Of Human Resource Development , Government of India.

This program is to enhance the quality of engineering education in the country by developing curriculum based video and web courses.In the first phase of the project, content for 129 web courses in engineering/science and humanities have been developed.

This is really a boon for self learners and engineering students who have less efficient technical resources for teaching and guidance.

siteshot

There are many video lectures delivered by experienced IITs/IISc lecturers which are concept oriented and are of industrial importance. For instance the Electrical and Electronic engineering branches have lectures on Embedded systems, Robotics, Artificial Intelligence, VLSI design,Power electronics etc.

Details about obtaining these courses can be found here

Collaboration with Google/YouTube:

The best part of the program is if you are connected to Internet, then you can view all the courses online in YouTube. There are about 3629 lecture high quality videos online, each running from 40 to 60 minutes. Each topic has a complete set of 35 to 45 videos organized as Playlists.

Downloading these lectures

These videos can be downloaded individually from sites like downloadyoutubevideos or can be mass downloaded using software like Free FLV converter or Internet Download Manager (IDM).

I will show how to download maximum of 10 videos simultaneously using IDM. It does this by capturing series of YouTube urls from Internet Explorer or Mozilla Firefox (Recommended). You can buy IDM or crack it to use it as a full version.

Just load some lecture videos (max 10) continuously in a window allow them to run at least 2 to 3 seconds. After this right click in the same window select “Download FLV video with IDM”---> “Choose from 10 last requested FLV videos”.

10vididm

A selection window opens and select the videos which you like to download.

alllinks

Comment those videos if needed and add it to the IDM download list by pressing OK.

idm

Downloading 10 videos simultaneously in a 2 Mbps BSNL broadband connection takes 3.5 to 4.5 hours.

Hope the information was useful!

Saturday, May 23, 2009

Multi-core Processors, Difference between Core 2 Duo and Intel Dual Core

Google returns ~7,340,000 search results for “Intel Core 2 duo Dual Core difference”. None of it gives a complete or satisfied answer after reading. Most of them are forums, where people have discussed about very specific ideas about the topic. So, I thought of giving some kind of detailed but a plain explanation in my first post.

Processor

Lets first see what a processor means in a digital system. In simple tech terms, it is a collection of transistors (in millions or billions) working together embedded on a silicon chip doing a large number of mathematical calculations per timing unit (technically known as frequency of the processor). To do these calculations it consumes some amount of power and dissipates considerable amount of heat.

Multi-core Processors

Performance and speed of a processor is enhanced by increasing the embedded transistor count or increasing the frequency rating. But at higher frequencies this transistor collection consumes a lot of power and dissipate greater amount of heat making them impractical to integrate into a single chip.

A simple automobile analogy is, just doubling the horsepower in car doesn’t double its top speed! Factors like friction, wind resistance make it unfavorable.

As transistors got smaller it became possible to pack more transistors on a single chip. So, to enhance the performance, chip designers decided to be more practical by placing several processors , each operating at lower frequencies on a single chip. Thus Multi-core Processors came into existence.

Intel’s Multi-core Processors

new pentd

Intel introduced its first dual core processor in 2005 based on Pentium brand named as Pentium D comprising of two dies (silicon chip), each containing a single processing core residing next to each other on a multi-chip module package. It had less efficiency suffering from high heat dissipation problems.

In 2006 it introduced its brand Core 2 processor Core 2 Duo based on Core micro-architecture.

3347-logo

Intel core 2 duo is the non-Pentium brand of processors with high efficiency and performance with a slightly elevated cost.

pentdual

Pentium Dual core is Pentium brand low cost, relatively low performance dual core processor released by Intel in competition with AMD’s low cost dual core processors.

In terms of features, price and performance at a given frequency, Pentium Dual-Core processors are positioned above Celeron but below Core and Core 2 microprocessors in Intel's product range.

Core 2 Quad processors were also introduced later in the Core 2 series.

AMD’s Multi-core Processors

AMD_Athlon_64_X2_logo

The well known Intel competitor AMD has also released its Dual-core Processors like Athlon X2 (64Bit).AMD Processors are known for their gaming efficiency due to their native graphics support from ATI.

Price

Intel

AMD

Hope I was able to give you some overview about Multi-core processors and their variants.